
When it comes to optimising your website’s performance, using a content delivery network (CDN) is one of the best things you can do. A CDN can speed up the delivery of your site’s content by caching it at locations around the world. This way, when a user tries to access your site, they will be able to load content from a server that is closer to them, which can significantly improve loading times.
There are many ways in which a CDN can improve the user experience on your website. One of the most important ways is by reducing loading times. If your site’s content is cached on a CDN, users will be able to load it from a server that is closer to them, which can make a significant difference in loading times.
In addition to improved loading times, using a CDN can also help to improve the stability of your site. If your site is hosted on a single server, it can be vulnerable to traffic spikes and other sudden increases in traffic. However, if your content is cached on a CDN, the load will be distributed across multiple servers, which can help to keep your site up and running during these periods of high traffic.
Finally, using a CDN can also help to protect your site from attacks. If your site is hosted on a single server, it can be more vulnerable to denial of service attacks. However, if your content is cached on a CDN, the attacker would need to target multiple servers to take your site down, which is much more difficult.
There are a few potential disadvantages to using a CDN, but they are generally outweighed by the advantages. One potential disadvantage is that you may have to pay for the service, although many CDN providers offer free plans for small websites. Another potential disadvantage is that you will need to configure your website to work with the CDN, but this is usually a relatively simple process. Overall, the advantages of using a CDN far outweigh any potential disadvantages.
There are a number of free CDNs available, including Cloudflare and Amazon CloudFront. If you are looking for a free CDN, we recommend starting with one of these providers.
We are going to recommend Cloudflare as it is one of the most popular and easy-to-use CDNs. They offer a wide variety of features, including DDoS protection, SSL certificates, and a web application firewall. Cloudflare also has a free plan that is perfect for small websites.
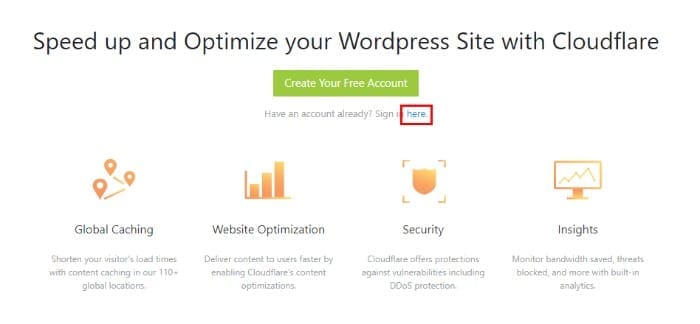
To get started with Cloudflare, sign up for an account and follow their instructions to add your website. Once you have added your website, you will need to select a plan. The free plan includes all of the essential features, so we recommend starting with this one. If you find that you need more features, you can always upgrade to a paid plan later.
Once you have signed up for an account and added your website, you will be able to access the Cloudflare dashboard.
The first thing you need to do is install the Cloudflare plugin on your WordPress site. This plugin will make it easy to manage your Cloudflare settings from within your WordPress dashboard.
To install the plugin, head to the Plugins section of your WordPress dashboard and click “Add New.” Then, search for “Cloudflare” in the WordPress plugin repository or download it from https://wordpress.org/plugins/cloudflare/
Once you have found the Cloudflare plugin, click “Install Now” and then “Activate.”
Now that the plugin is installed and activated, you need to connect it to your Cloudflare account. To do this, head to the Cloudflare tab in your WordPress dashboard under settings and click “Sign in here.”
Enter your Cloudflare API Credentials
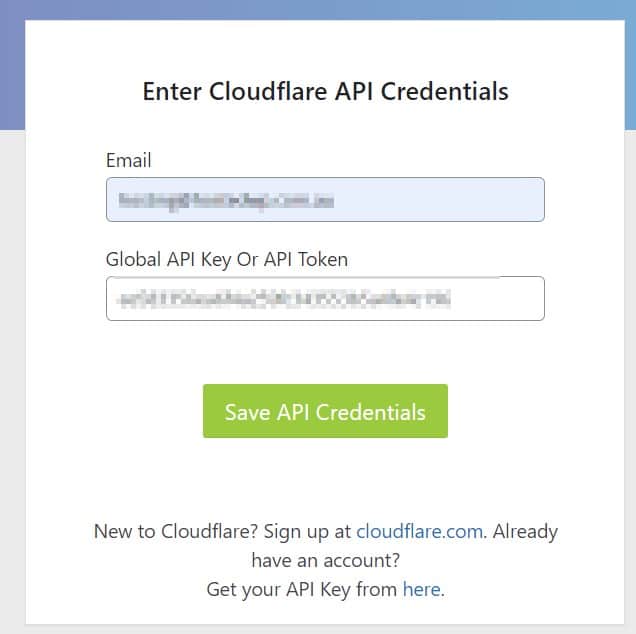
You can access your Cloudflare API at https://dash.cloudflare.com/profile/api-tokens
In the Cloudflare tab, paste your API key into the “Cloudflare API Key” field and click “Save Changes.”
Your WordPress site is now connected to your Cloudflare account!
Now that your site is connected to Cloudflare, it’s time to configure your settings. To do this, head to the “Cloudflare Settings” page in your WordPress dashboard.
The first thing you need to do is select which domain you want to enable Cloudflare for. If you have multiple domains, you will need to repeat this process for each domain.
Next, select the plan that you want to use. The free plan includes all of the essential features, so we recommend starting with this one. If you find that you need more features, you can always upgrade to a paid plan later.
Finally, select the security level that you want to use. The default setting is “Medium,” but you can also choose “High” or “Low.”
Once you have configured your settings, click “Save Changes.” Your Cloudflare settings are now active!
Using a CDN can have several benefits for your website, including improved loading times, increased stability, and protection from attacks. If you are looking for a free CDN, we recommend starting with Cloudflare. To get started with Cloudflare, sign up for an account and follow their instructions to add your website. Once you have added your website, you will need to select a plan. The free plan includes all of the essential features, so we recommend starting with this one. If you find that you need more features, you can always upgrade to a paid plan later. If you need assistance in optimising your WordPress Website, contact Hosted WP.
Hosted WP is a WordPress Website Management Company offering support, Maintenance, and Optimisation services for WordPress websites. We have a team of experienced WordPress developers and support staff to help you with any issues you may have with your website. Contact us today to learn more about our services!